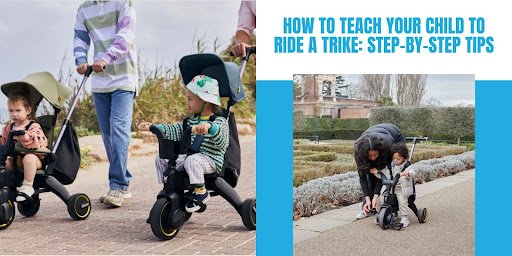
The next magical parenting moment that you will appreciate throughout your life is when you see your tiny one riding along on three wheels to independence. It is not only a matter of taking your child to point A and point B when it comes to their tricycle riding skills, but it is a stepping stone towards balance, coordination, and confidence that will go a long way when it comes to mountain-biking and even after that. You either have just taken home the first kids trike or you are about to take the first interesting ride with your child and this guide is going to take you through all that you need to know to make the learning process safe, fun and successful to you and your tiny biker.
The Importance of Learning to Ride a Trike
It is always good to know why tricycle riding is a significant developmental activity though before going into the how-to of it. Taking trike is an activity that teaches children the gross motor skills because they learn to co-ordinate their legs in a pedaling movement. It makes their leg muscles and core more stable which is a required aspect in their physical life.
In addition to physical advantages, learning to ride, children learn spatial awareness, problem-solving, and cause-and-effect relationships. They watch the trike turn as they spin the handlebars. The faster they pedal the faster they move. These are the mere physics lessons that are second nature through play. However, most importantly, learning a new skill such as how to ride a trike provides the children with a massive confidence booster, which makes them approach their other challenges with zeal.
Rights Trikes and Safety Gear Preparation
Teaching the steps of using a tricycle to toddlers is a success that can be achieved only through appropriate preparation. To begin with, the trike must be of the appropriate size and the child. In sitting position, your child must be in a position that can ensure that the feet are flat on the pedals with slight bending of the knees at the lowest point of the pedal action. When they are straining to reach or even when their knees are pulled together too high, then the trike is not the right size, and learning will be frustrating and even unsafe.
Ensure that all the components are firmly fixed and the trike is well maintained. Check the steering, make sure it is moving freely and also check on any safety feature that may have been added to the vehicle such as the seat belt or harness.
The use of safety equipment is no debate. The helmet is necessary–must fit the head squarely, on the forehead, and must be pulled in with the straps rounded like a V, under each ear. The chin strap must be firm and yet not tight that only one or two fingers can fit in. Although knee and elbow pads are not always required during tricycle riding on flat and safe grounds, they may add additional safety and assurance to the children who might be more cautious than on the flat and safe surfaces or those who are riding on a more challenging surface.
Select a flat, smooth and traffic-free safe practice site. A footpath, park pathway or driveway is ideal. Keep out of the way of the child with a slope till he has the rudiments.
Raising a Child: How to Teach Child to Ride Tricycle
The actual teaching process is now the main event. This pedagogy of child tricycle learning divides the process into manageable steps which are stacked over each other.
Step 1: Familiarization
Have your child play around with the trike as long as it is still. Make them seat on the seat, grip the handlebars and put their feet on pedals. This pressure-free ride makes them feel at ease with their new ride. Discuss the various components – “These are the pedals that your feet will be on, these are the handlebars that will steer you.”
Step 2: Assisted Sitting and Positioning
Have your child sit upright on the seat with the hands on the handle bars and ensure that the back is against the seat. Place the feet on the pedals. Other children just know the peddling movement, whilst others require demonstration. They may also require you to push their legs through the circular peddling motion a number of times as you explain to them, pushing down with this foot, then pushing down with this foot.
Step 3: The First Push
Stand behind or next to the trike and press it lightly when your child has his or her feet on the pedals. This will assist them to experience the feel of motion and learn the reaction of the trike to their position and weight. These preliminary pushes should be slow and steady.
Step 4: Pedaling
Once they are familiar with the pushing action, have them push the pedals by themselves. You may have to push the trike at first or you may have to take their feet through the motion. Give positive words such as, push, push, push! to create a rhythm. By giving attention to one foot that is dominant many children do succeed – “Push hard with your right foot!”
Step 5: Steering Practice
After the development of basic pedaling, add steering. Instruct your child to avoid some easy barriers, such as cones or marks on the chalkboard and have them avoid them. Begin by performing wide turns and then move to more manoeuvre-based ones. Demystify by stating that by simply rotating the handlebars in the direction they desire, the trike will follow.
Step 6: Developing Independence
Gradually decrease the amount of physical assistance with a growingly confident child. Switch between walking and riding the trike and then supervising. Be appreciative about every independent ride, however short.
Suggestions of the Pitfalls Parents Must Not Make
However, parents mean well but occasionally they unintentionally increase the difficulty of the learning process. Here are pitfalls to avoid:
Pushing Too Fast
Each child is different; he/she grows his/her own way. There are those who may learn to ride a tricycle in an afternoon; and then there are those who require weeks of training. Hurrying or displaying impatience may cause panic about riding.
Picking the Inappropriate Place
Learning becomes unnecessary and risky when the area of learning is a slope or a level surface. At all times start on even ground.
Being Forgetful About Praise
When emphasizing the correction, parents occasionally fail to acknowledge little achievements. Give rewards to any improvement, no matter how small, such as the ability to sit on the trike correctly or the ability to make their first complete pedal turn.
Failure to Pay Attention
Toddlers have a limited attention span and they get exhausted easily. Make practice sessions short (usually no more than 15-20 minutes are enough) and ensure you always stop on an uplifting note.
How to Ride a Trike Among Kids
Turn practice into play with these trike riding tips that would make learning not look so much like a job:
Make a Race Track
Using chalk draw a race track with a starting line and a finishing line. Time your child in the race and have personal bests.
Treasure Hunts
You can set some little gifts or sweets around your practice space, and invite your child to a ride to pick them.
Follow the Leader
Rotate and be the Leader: This is a cycling game whereby you and your child switch roles and the child follows your walking route on his trike learning to steer and maintain speed.
Themed Rides
Make-believe Rides – “Go to the zoo!” or “We are going to the moon!” – to awaken their fancy.
Sibling Involvement
In case you have older children, challenge them to ride or ride with them in their other bikes and make it a family activity.
Building Confidence the Hard Way
It is equally important to teach your child to be confident as much as you teach him to play. Bear the attitude of being positive and patient in the process of learning. When difficulties come in – and they will – do not interpret them as failures, but as learning processes. “That was a close, but I saw you come near it! Let’s try again.”
Institute a routine practice. Regularity in this case assists the children in building their muscle memory and demonstrates to them that you are interested in their performance. Five minutes of the practice every day is more practical than a single, long session each week.
Record the trip in photos or videos. The kids are interested in seeing how they are doing and these memories are kept as precious souvenirs. Share the achievements with the family members and give your child a chance to show his/her new skills and get more support.
It is vital to keep in mind that all children are unique. Others are simply on the defensive side and may take some time before they gain confidence and others are fearless and may need to be told more about safety. Teach according to your child and his personality.
Conclusion
Learning to ride a trike with your child is a gratifying experience that helps establish your bond and enable the child to gain the essential physical and mental abilities. These steps on teaching toddler tricycle will ensure your child is positioned on three wheels and more with patience and celebrating the progress. However, keep in mind that it is not about being perfect it is about developing confidence, coordination, and enjoyment of active play which will help them all their life.
When you are ready to select the right ride to ride with your little, Go Easy Online will have a great choice of good quality and safety tested rides. The variety of their age-specific and durable designs will help you to find the most suitable tricycle for kids that will suit your child and his/her size, level of skills and personality. Once equipped, instructed, and encouraged enough, your child will be riding as soon as you like, making lifetime memories and skills.