

Why Epoxy Resin Looks Hard (But Isn’t)
If you’ve ever paused on a resin video online—watching someone pour that clear, glass-like liquid into a mold—you’ve probably thought, “That looks incredible… but I’d definitely mess it up.”
You’re not alone. Many beginners assume epoxy resin is something only pros can handle. The truth? It’s easier than it looks—especially if you start small and give yourself space to experiment.
Working with resin isn’t about perfection or chemistry degrees; it’s about rhythm, patience, and curiosity. The first time you see the mixture settle smooth and glossy, you realize it feels less like science and more like meditation in motion. Mistakes happen—but they’re fixable. Every pour teaches you something new.
It’s also surprisingly grounding. There’s a quiet satisfaction in measuring, stirring, and waiting. It forces you to slow down in a way that most modern hobbies don’t. By the end of this guide, you’ll know how to start, what to avoid, and how to turn simple materials into something worth showing off.
Before You Start — Tools, Setup, and the Best Resin for Beginners
Every successful resin project begins long before the first pour. Good prep doesn’t just make things safer—it makes the whole process smoother and far more enjoyable. Think of it as setting the stage before the performance.
Here’s what you need to get ready:
Essential tools:
Mixing cups with clear markings, stir sticks, gloves, a digital scale, and a flat, dust-free surface. No studio setup required—just accuracy and patience.
Workspace setup:
Pick a bright, well-ventilated area where your project can sit untouched for at least 24 hours. Cover your table with parchment paper or plastic to catch drips. Keep the room around 70–75°F (21–24°C) for the best results.
If you’re just starting out, choose an epoxy resin for beginners that cures slowly and evenly. A forgiving formula gives you time to move at your own pace and learn how resin behaves.
Bond Craftor offers beginner-friendly resin kits with clear setup guidance and simple mixing steps—helping first-time makers start with confidence. Once the setup feels right, that nervous energy turns into excitement, and you’ll find yourself eager to pour instead of hesitating.
Step-by-Step Tutorial — How to Make Your First Epoxy Resin Project

Now for the fun part—your first pour.
The process follows an easy rhythm: measure, mix, pour, and wait. Every step builds skill, and by the end, you’ll see patience pay off in shine.
Measure with Care
Use a digital scale instead of guessing. Follow the ratio on your bottle (most kits use 1:1 by volume or 2:1 by weight). Accurate measurement is what separates a glass-clear cure from a sticky surface.
Mix Slowly and Thoroughly
Add the hardener into the resin and stir gently for two to three minutes. Scrape the sides and bottom of your cup as you go. This isn’t a race—it’s about even blending, not speed.
Add Color or Texture (Optional)
When the mix turns clear, it’s time to play. Add a drop of pigment, a swirl of metallic powder, or a sprinkle of glitter. Keep color below about five percent of your total resin volume to avoid imbalance. The beauty of resin is how forgiving it feels—you can make every pour your own.
4. Pour with Patience
Pour slowly into your mold or over your surface. Small bubbles will rise—don’t panic. Sweep a heat gun or torch lightly across the surface to pop them, then step back and let chemistry do its work.
Let It Cure—No Rush
Most resins need a day or two to harden fully. Cover your project loosely to keep dust off. Waiting might feel endless, but it’s also where the transformation happens. You’ll check it once or twice, then suddenly, the surface looks like still water—a perfect reflection of your patience.
If this is your first try, a beginner kit from bondcraftor.com helps remove the guesswork. Each kit includes straightforward mixing ratios and simple curing tips made for newcomers, so you can focus on learning instead of troubleshooting.
When you finally see that smooth, glassy finish, you’ll realize the hardest part wasn’t the pour—it was deciding to start.
Fixing Beginner Mistakes — What to Do When Resin Misbehaves
Not every pour will be perfect—and that’s okay. Even experienced makers get bubbles, soft spots, or cloudy finishes. Most problems have quick fixes once you know the cause.
Sticky Surface
If your resin stays tacky after two days, the mix ratio was off or you didn’t stir enough.
Fix it: Lightly sand the surface, then pour a thin new layer with the right mix. Don’t toss it—consider it your first resin lesson.
Too Many Bubbles
They show up when you mix too fast or pour too quickly.
Fix it: Warm the bottles before mixing, stir slowly, and use a heat gun after pouring. Smooth movements make clearer resin.
3. Cloudy or Milky Finish
Cold air or moisture interferes with curing.
Fix it: Keep the room steady around 70–75°F (21–24°C) and humidity below 60%. Cloudiness almost always links back to temperature or moisture.
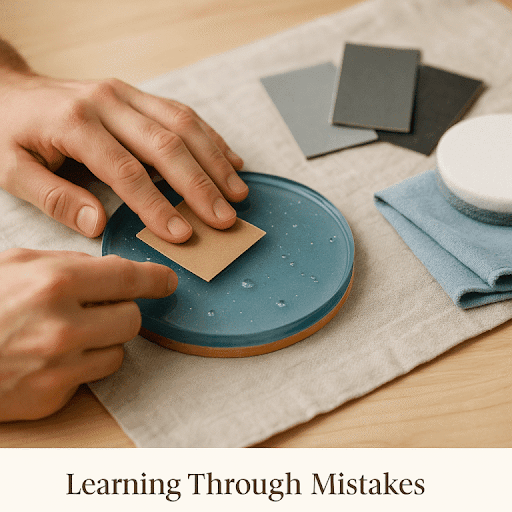
Dull or Uneven Shine
If it looks matte instead of glossy, it just needs polishing.
Fix it: Sand gently through several grits—400, 800, 1500—then finish with a plastic polish or soft pad. Patience brings the shine back.
Each mistake builds skill. Once you fix one problem, you won’t forget the solution. Eventually, even errors start feeling like part of the learning curve—tiny experiments that quietly make you better.
Conclusion — Every Expert Starts Here
Every resin artist remembers their first pour: mixing nervously, waiting endlessly, and hoping it actually cures. That first piece always feels uncertain, but it’s unforgettable. You learn how resin moves, how it reacts, and how patience quietly shapes the finish.
Working with epoxy isn’t about chasing perfection. It’s about slowing down long enough to make something real. With time, you’ll see that each mistake was part of the process—every layer adding to the next until your work feels effortless.
When the resin sets and light bends through your piece, you’ll remember why you started.
There’s pride in that stillness—the kind that comes from making something with your own hands.
Start small, trust the rhythm, and remember—every glossy, polished creation began exactly where you are right now: with curiosity, steady hands, and a beginner’s heart.