

Whether you’re a professional content creator or just getting started with video editing, the one thing we can all agree on is that templates are a game-saver. They eliminate the guesswork behind design, hasten production, and make your videos look as slick and professional as possible—even if you are working against the clock. Plus, if you’re working with narration, CapCut supports text to speech features that can save even more time by converting your script into a realistic voiceover.
Why Use Templates in CapCut Desktop Video Editor?
Let’s begin with the most obvious question: why use templates in the first place?
The solution is straightforward—speed and quality. Templates enable you to produce professional-quality content without needing to construct everything from the ground up. Whether you’re producing a social media video, a business ad, or a personal vlog, templates assist you:
- Save time with pre-made layouts.
- Maintain a consistent look throughout your videos.
- Add trending designs in a snap.
- Appear polished, even if you don’t have advanced editing skills.
CapCut templates have transitions, animations, placeholders, text styles, and effects built in. Simply plug in your content and go.
What Are CapCut Templates?
CapCut Desktop Video Editor templates are pre-formatted video structures that you can fill with your own photos, videos, and text. Some are built specifically for certain platforms (such as TikTok or Instagram), but others can be used for YouTube intros, product demonstrations, travel summaries, or meme edits. These templates can also be a great match when paired with content produced using an AI video generator, especially when creating high-volume or recurring formats. CapCut Desktop also provides you with access to built-in templates and templates created by the community, depending on what type of content you’re creating.
Step 1: Open CapCut and Access the Template Library
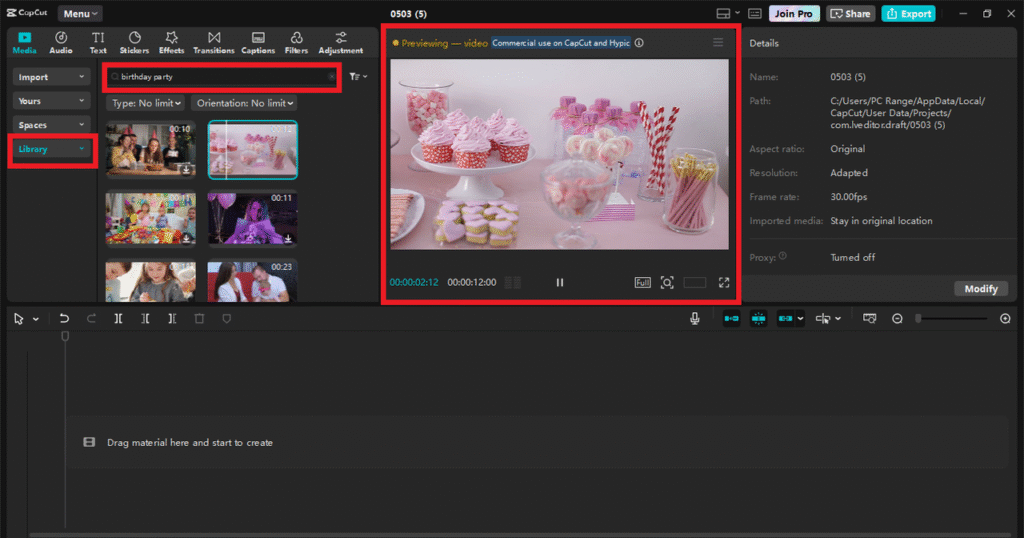
Open up the program and click “New Project” to open up your workspace. Here is where you’ll edit your template. Look on the left-hand sidebar or top navigation menu. You’ll find a “Templates” option that opens up a wide range of categorized designs. Some common template types include:
Reels & Shorts
Vlog Openers
Text Slides
Promotional Banners
Event Montages
You can browse or search for a template. You can filter by category, duration, orientation (vertical or horizontal), or search for specific keywords (e.g., “travel”, “birthday”, “trendy”). When you find a template that you like, you click it to see how it plays.
Step 2: Add the Template to Your Timeline
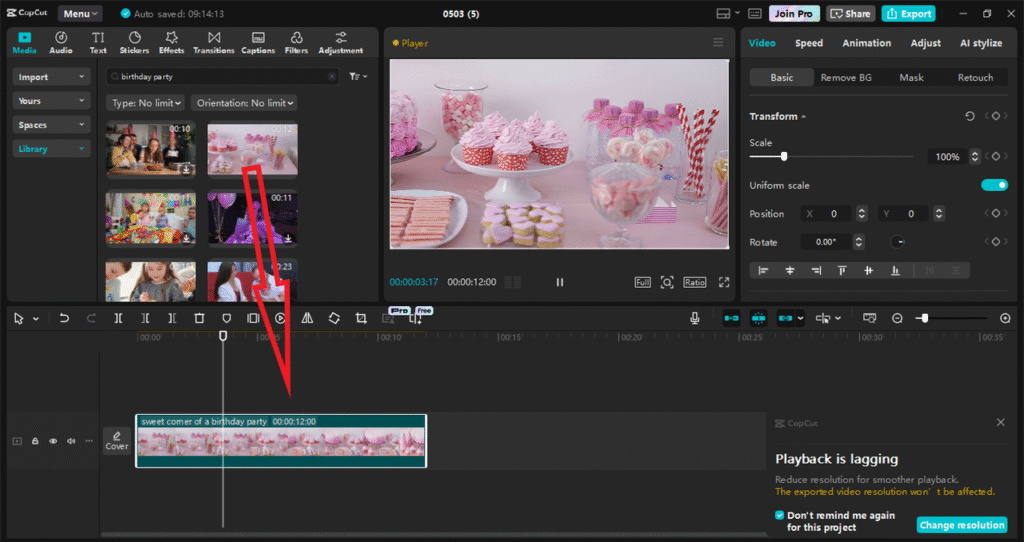
Now that you have found a template, you can begin to customize it. After previewing the template and deciding you want to use it, click on the “Use” button. This will place the template on your project timeline. The template structure appears on the timeline
You’ll see placeholders in the timeline, typically marked as:
Video 1, Video 2
Image Placeholder
Title Text
Subtitle
They are meant to be replaced with your content. It’s a skeleton – CapCut offers the framework, and you add the meat.
Step 3: Replace Placeholder Media with Your Own
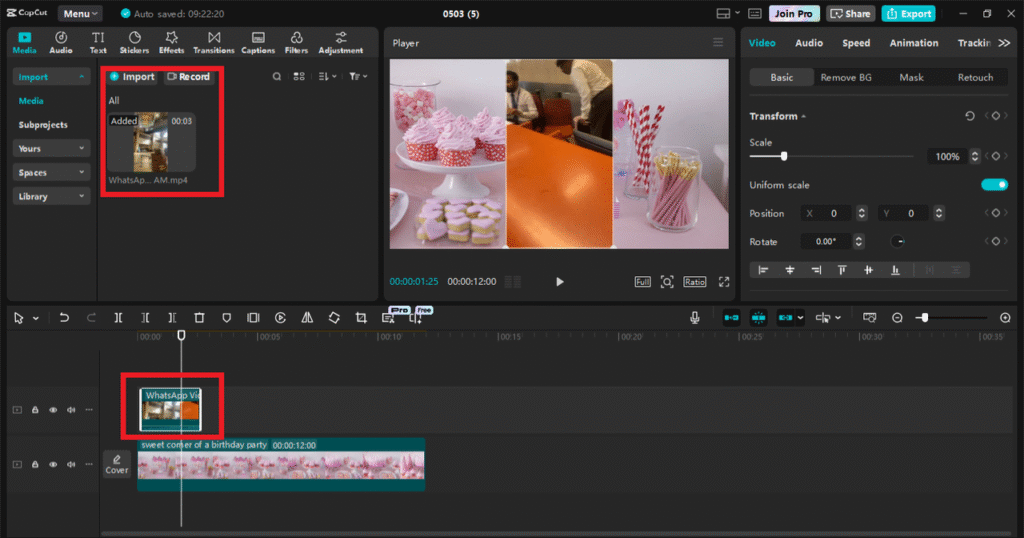
Import your media files. Press the “Import” button to upload the photos, videos, or logos you need. CapCut supports most regular file types, so you’re all set if it’s a screen capture, camera video, or selfie. Drag your own media onto the respective placeholders in the timeline. Upon dropping them on top of the placeholders, CapCut will automatically replace the media and preserve the timing, effects, and animations.
If your image or video is longer or shorter than the placeholder, you can trim it directly on the timeline. The transitions and effects will still work. Play the video back frequently to check out how your edits look as they’re in motion. This will allow you to catch pacing problems or mismatched clips earlier.
Step 4: Personalize Text, Fonts, and Colors
Templates usually include pre-written titles and styled text, but you’ll want to personalize them. In the preview window or timeline, select the text object you’d like to alter. A window will appear to the right of the screen. Delete the dummy text and write on your own. Be brief and punchy with your text—templates usually expect rapid consumption.
Alter font style, size, color, background, alignment, and animation. CapCut provides a rich set of contemporary fonts and text styles, or you can add your own font for brand consistency. When you want to make it simpler or introduce new information, you may copy text layers, delete stickers, or add new ones from CapCut’s library. For extra creativity or fun, consider trying CapCut’s voice changer to give your video narration a unique twist.
Step 5: Final Touches and Export
Once your text and media are in, it’s time to fine-tune and export your video. Review your video from beginning to end. Check for clunky transitions, misspellings, or clips that are too short or too long. Make minor tweaks where necessary. Most templates come with background music, but you can mute it and replace it with your own. CapCut also has an in-app music library, or you can import your own custom tracks or voiceovers. Do you want your text to bounce a bit quicker? Do you want to apply a filter to make the color grading consistent? CapCut provides you with complete control to adjust animations, overlays, or visual filters—even within a template.
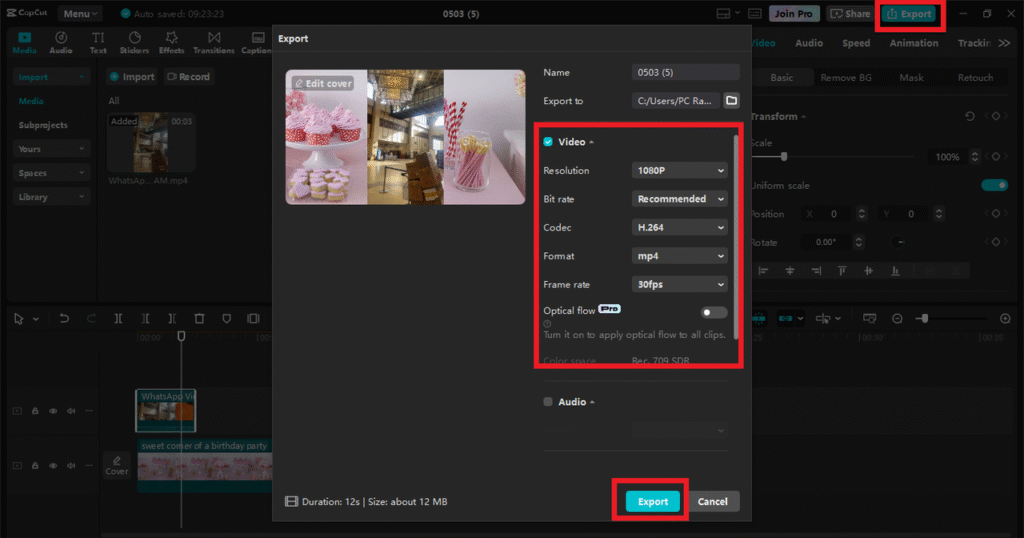
Now export your video. Click “Export” in the top-right corner. Choose your resolution (720p, 1080p, or 4K), format (MP4 is best), and frame rate. Give your file a clear name and select where to save it. After a short render, your video is ready to post on your platform of choice.
Final Thoughts
CapCut Desktop templates are not shortcuts—their intelligence makes them smart tools that allow you to design lovely, efficient content in less time and with less hassle. From a weekly vlog to a business promotion, or even a birthday montage, templates can make your workflow easier and your video’s production quality better.